1. What this app does
Cost Wise replaces a notebook or spreadsheet for a small food business. Everything works fully offline — there is no server, no account to create, and no internet connection required for any feature. All data lives only on the device it was entered on, unless you export and restore a backup yourself.
The app answers four questions every day: how much did I sell, how much did I spend, what's my profit, and what do I need to watch (low stock, an unclosed day, wasted stock)?
2. Getting started
First-time setup
The first time you open the app, you'll go through a short two-step setup:
- Business info — your business name, business type (Eatery, Food Stall, Café, or Restaurant), and currency.
- First product (optional) — add your first menu item's name and price, or skip and add products later from Settings.
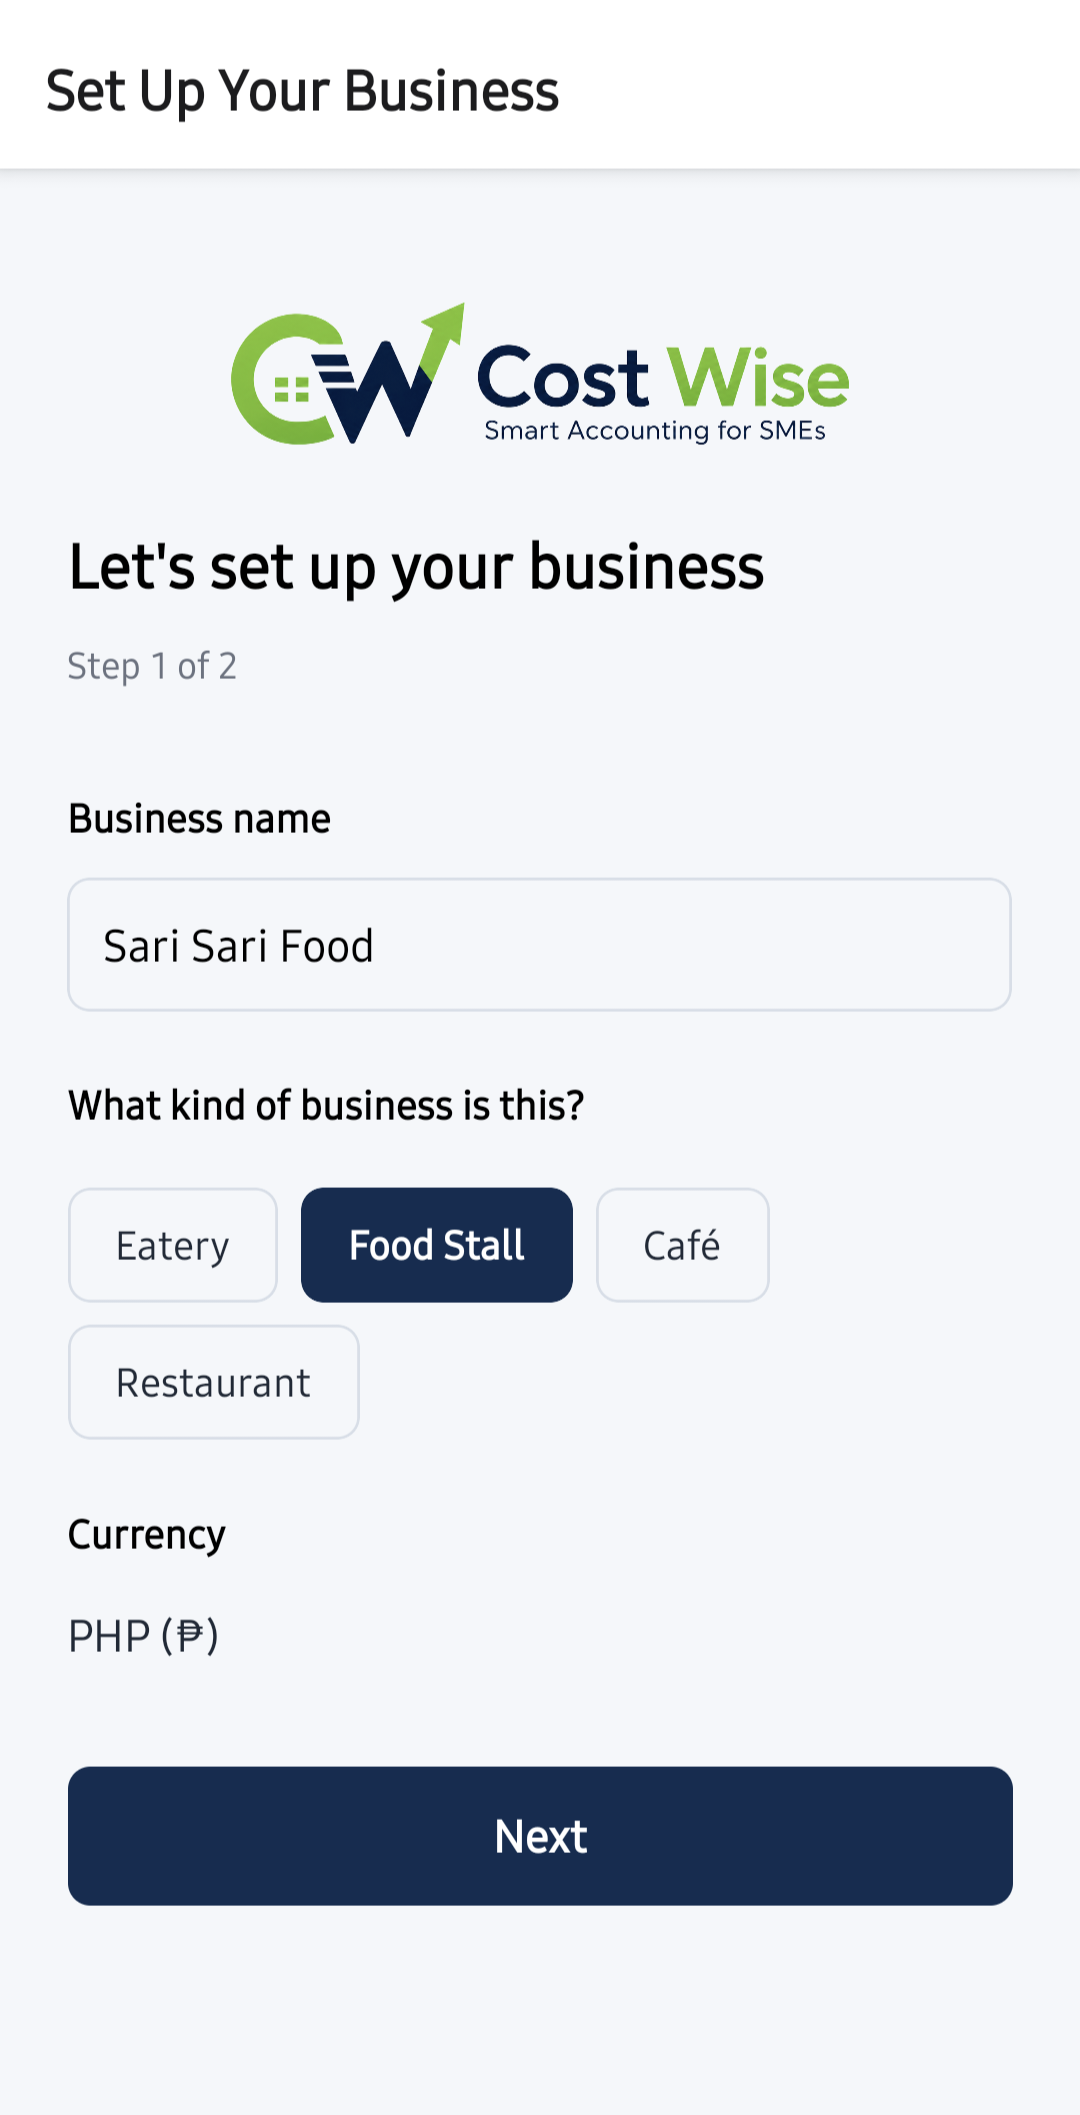
Step 1 — Business info
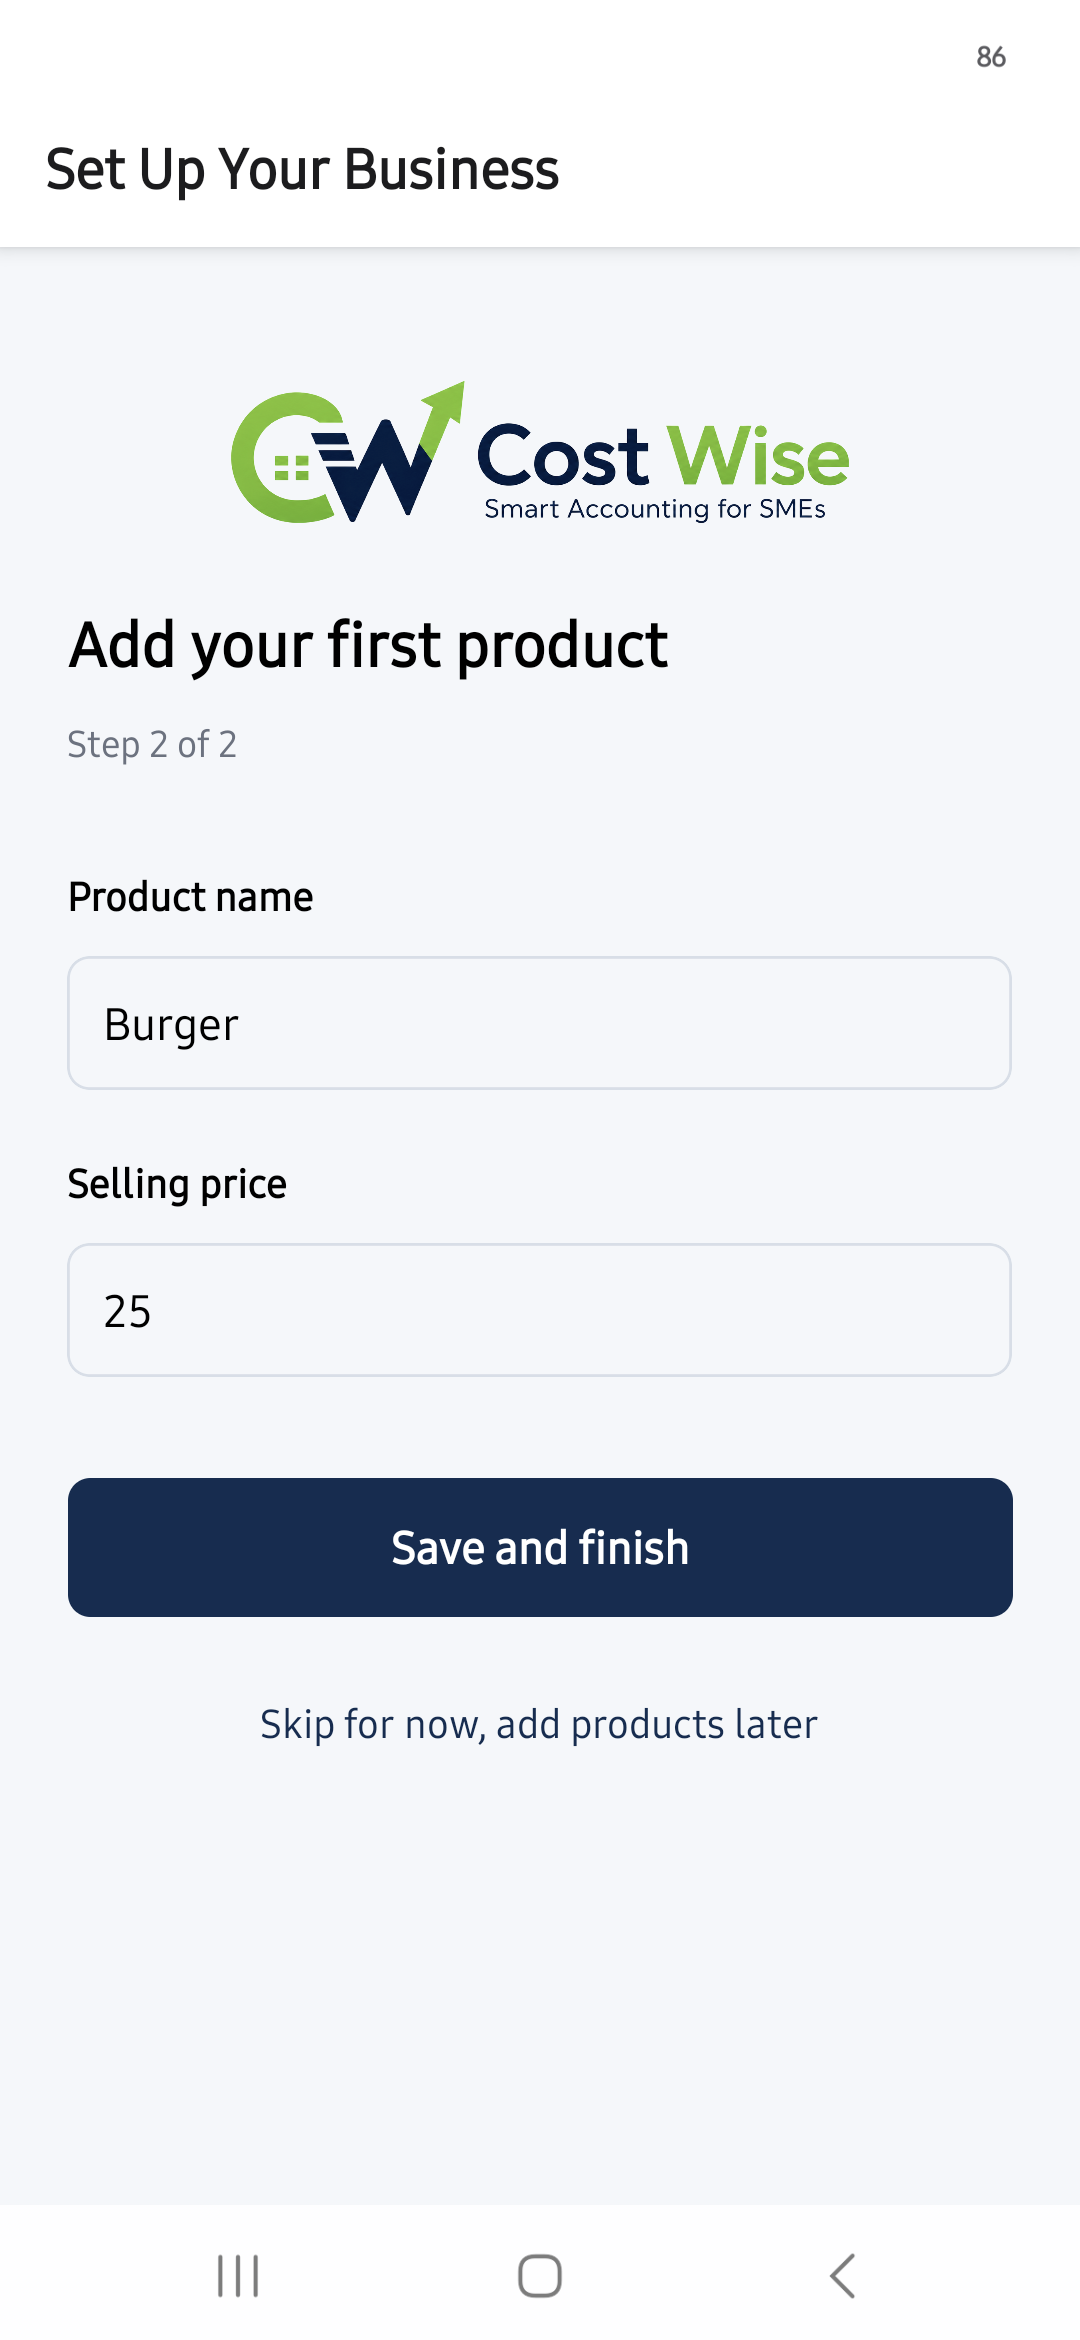
Step 2 — First product
The Dashboard (home screen)
The Dashboard is what you see every time you open the app. It shows:
- Today's Sales, Expenses, and Profit as three headline cards.
- Alerts — shown only when relevant: nothing logged yet today, yesterday wasn't closed, today is already closed, or ingredients are running low.
- A recap of yesterday (sales/expenses/profit) the first time you open the app each day.
- Log a Sale and Log an Expense buttons — the two most common actions.
- Quick Entry (Chat) — type what happened in plain language instead of using the forms.
- Close today — appears once you've logged at least one transaction.
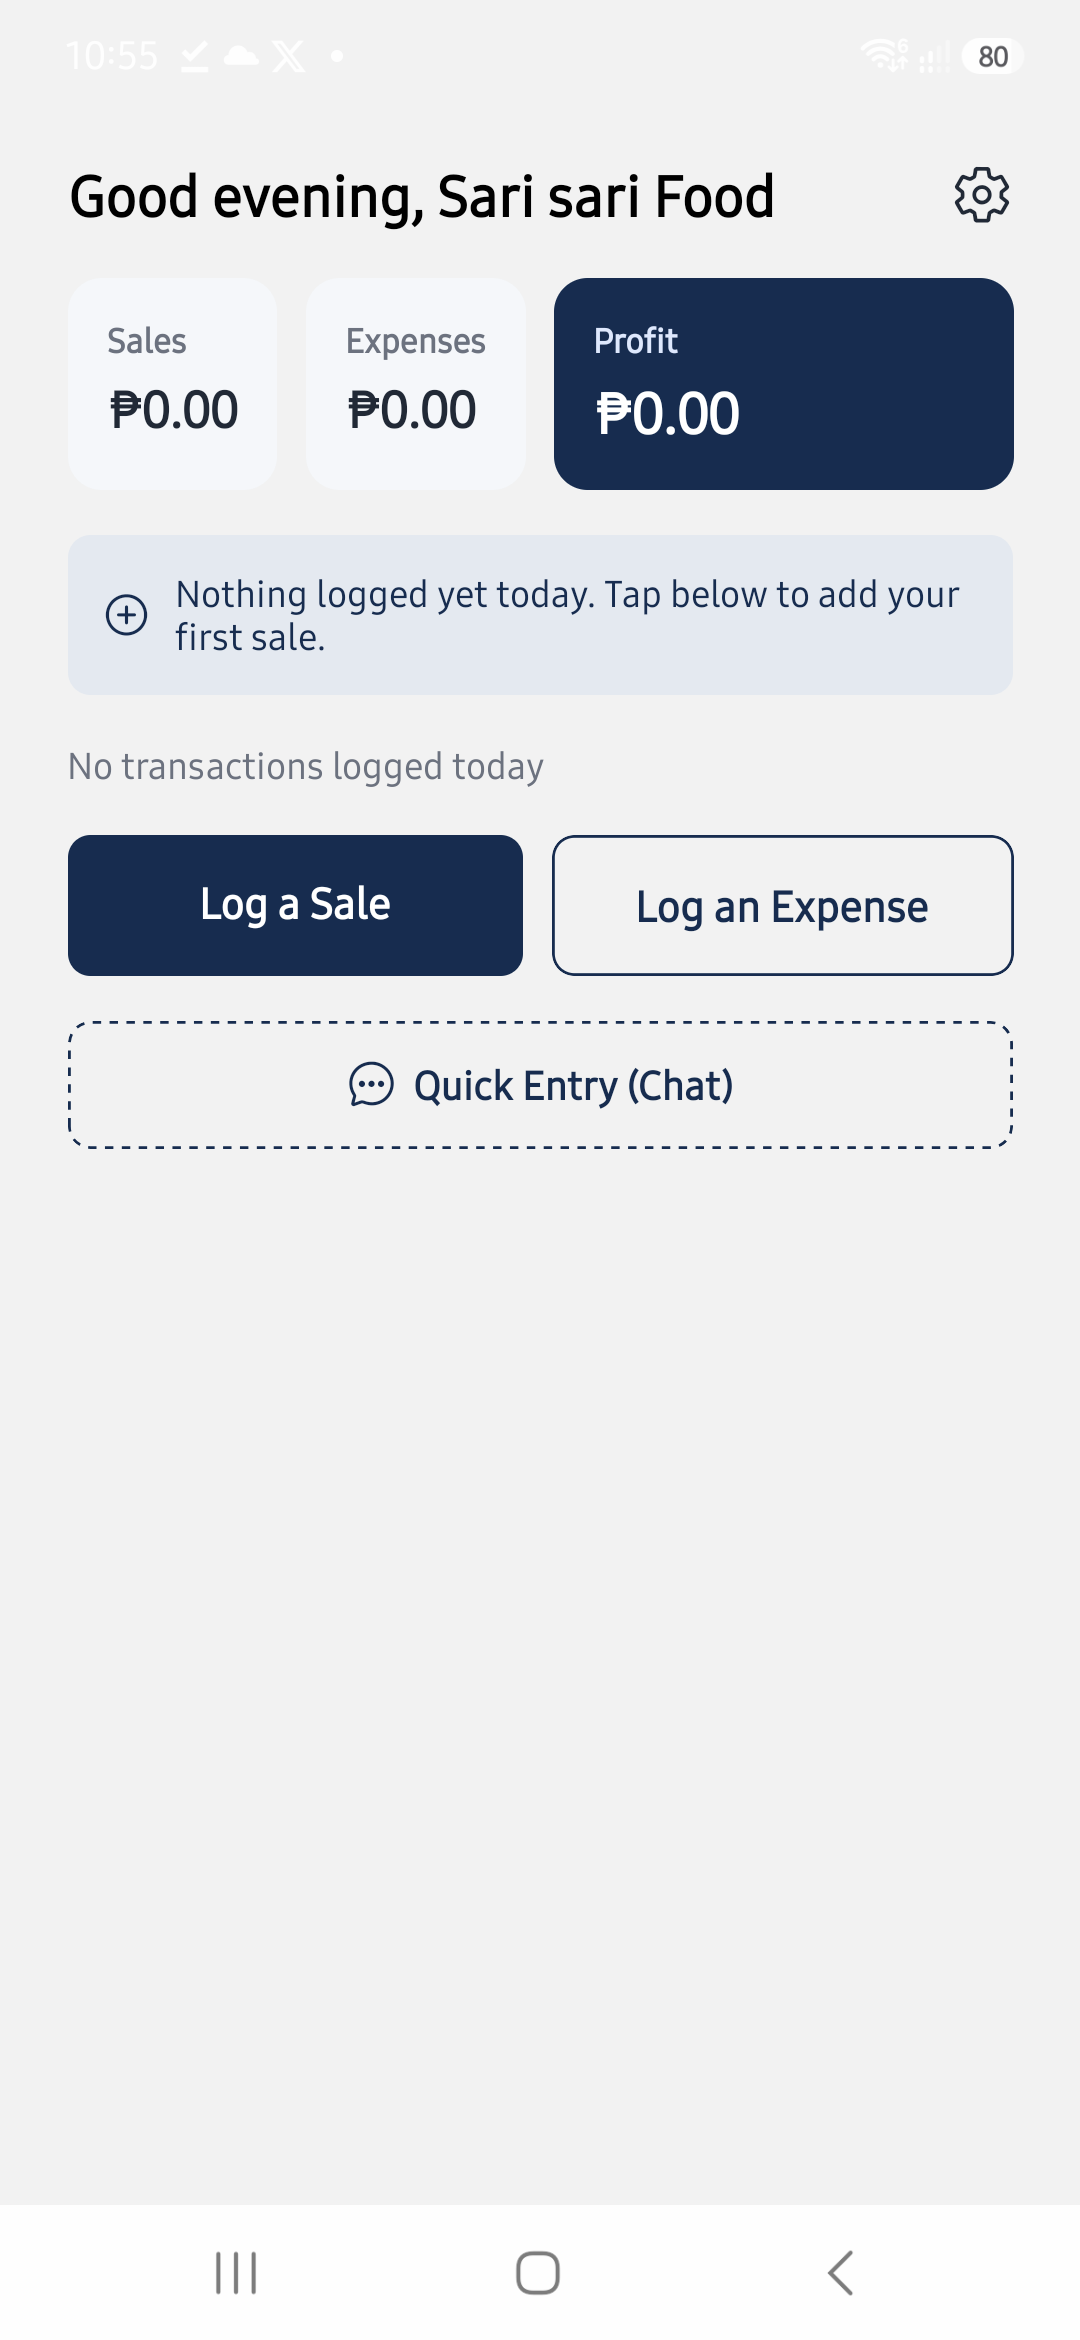
The Dashboard — your home screen every time you open Cost Wise.
3. Logging a sale
Tap Log a Sale from the Dashboard. You can log a sale two ways:
- Itemized — tap one or more products from your menu grid, adjust quantities, and save. Supports multiple products in a single sale.
- Total (lump-sum) — enter one total amount for the sale instead of itemizing, for busy moments when itemizing isn't practical.
Every sale can be tagged with a payment method (cash, digital, or credit) — recorded as a label only; the app does not track a running credit balance.
If a product has a recipe, logging that sale automatically deducts the recipe's ingredients from your inventory. You can edit or void any sale from Today's Sales (tap the Sales headline card). Voiding a sale reverses any inventory it deducted.
4. Logging an expense
Tap Log an Expense from the Dashboard. Choose a category (Ingredients, Supplies, Rent, Utilities, Salaries, Maintenance, or Other), enter the amount, and optionally a note.
You can attach a photo of the receipt using your camera for your own reference. If you'd rather have the app try to read the receipt for you, use Scan Receipt instead.
You can edit or void any expense from Today's Expenses (tap the Expenses headline card).
5. Scanning a receipt
From Expense Entry, choose Scan Receipt to open your camera. The app reads the photo on-device — no photo or text ever leaves your phone — and tries to pre-fill:
- The expense amount (looks for Total/Grand Total first)
- The supplier name (matched against your history for category pre-fill)
- The receipt date, if legible
- A detected quantity hint (e.g. "Detected quantity: 2") — informational only
You always review and can correct anything before saving. If the app can't read a receipt, it tells you so and lets you fill in the fields yourself.
6. Managing products, inventory, and recipes
From Settings → Manage Products, you can add, edit, and price your menu items.
From Settings → Manage Inventory, you can:
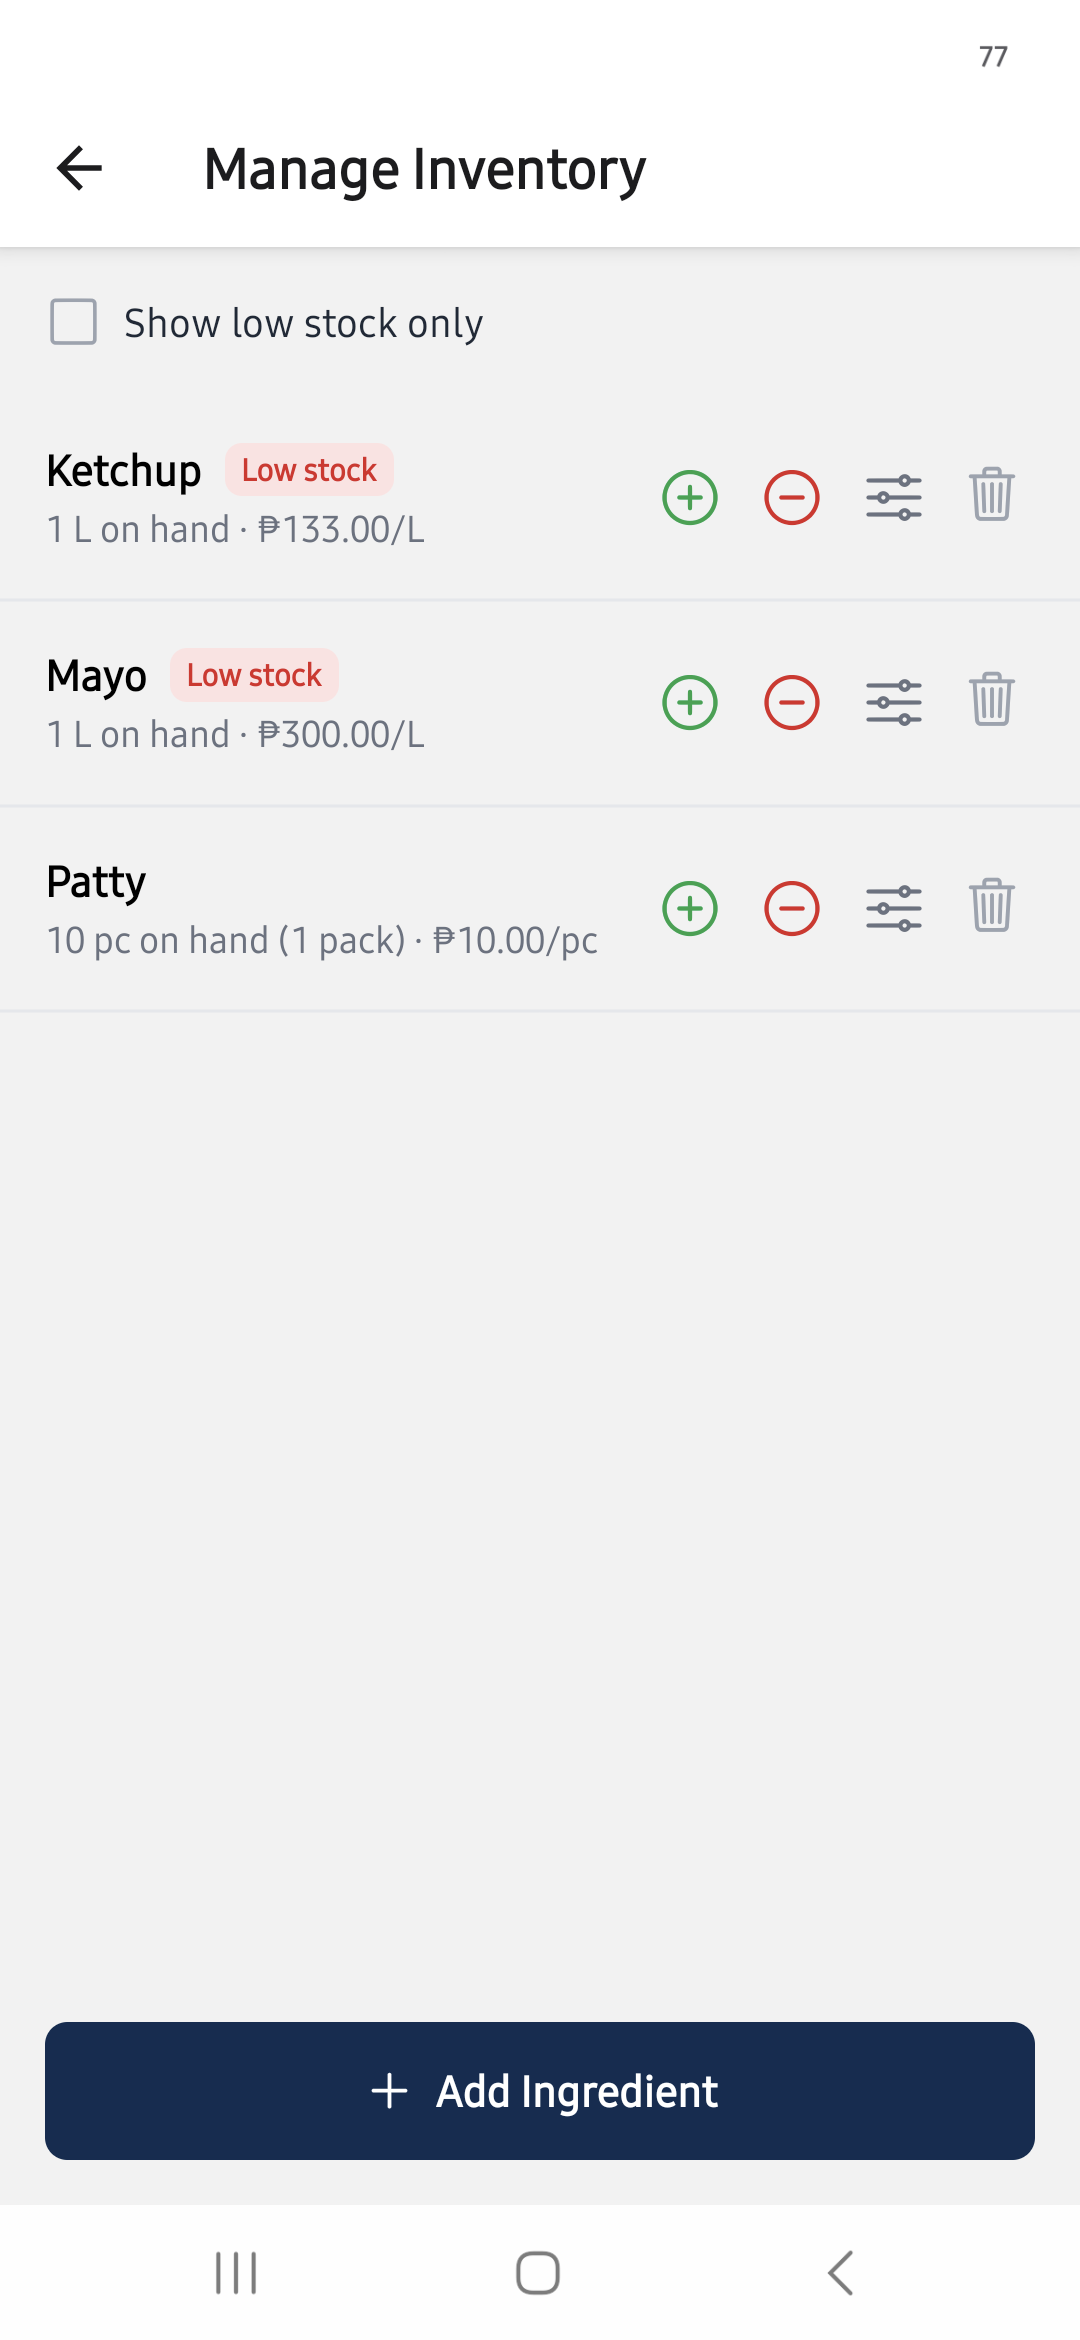
- Add ingredients to your catalog (name, unit of measure, low-stock threshold).
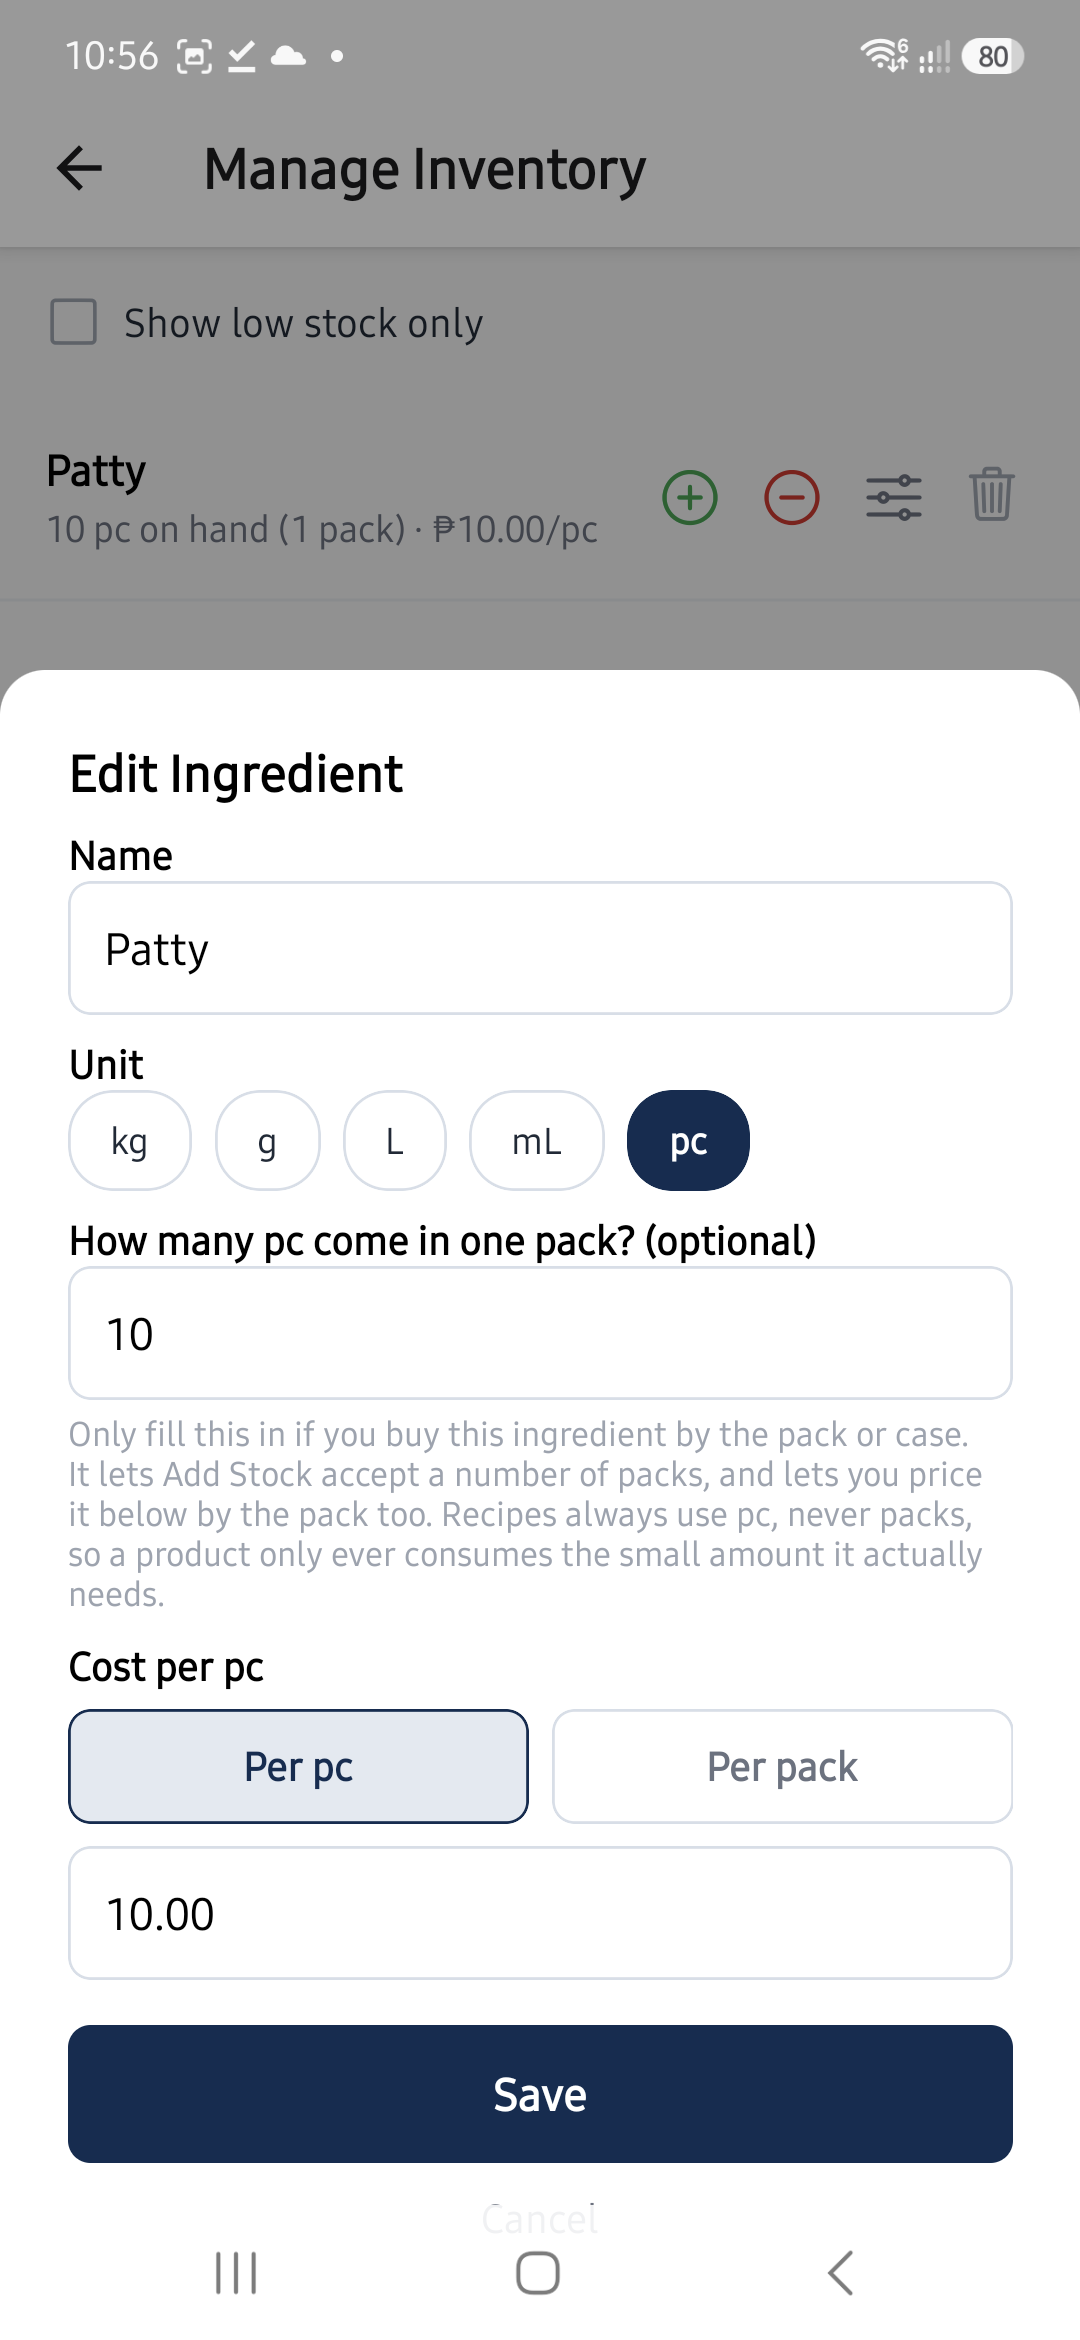
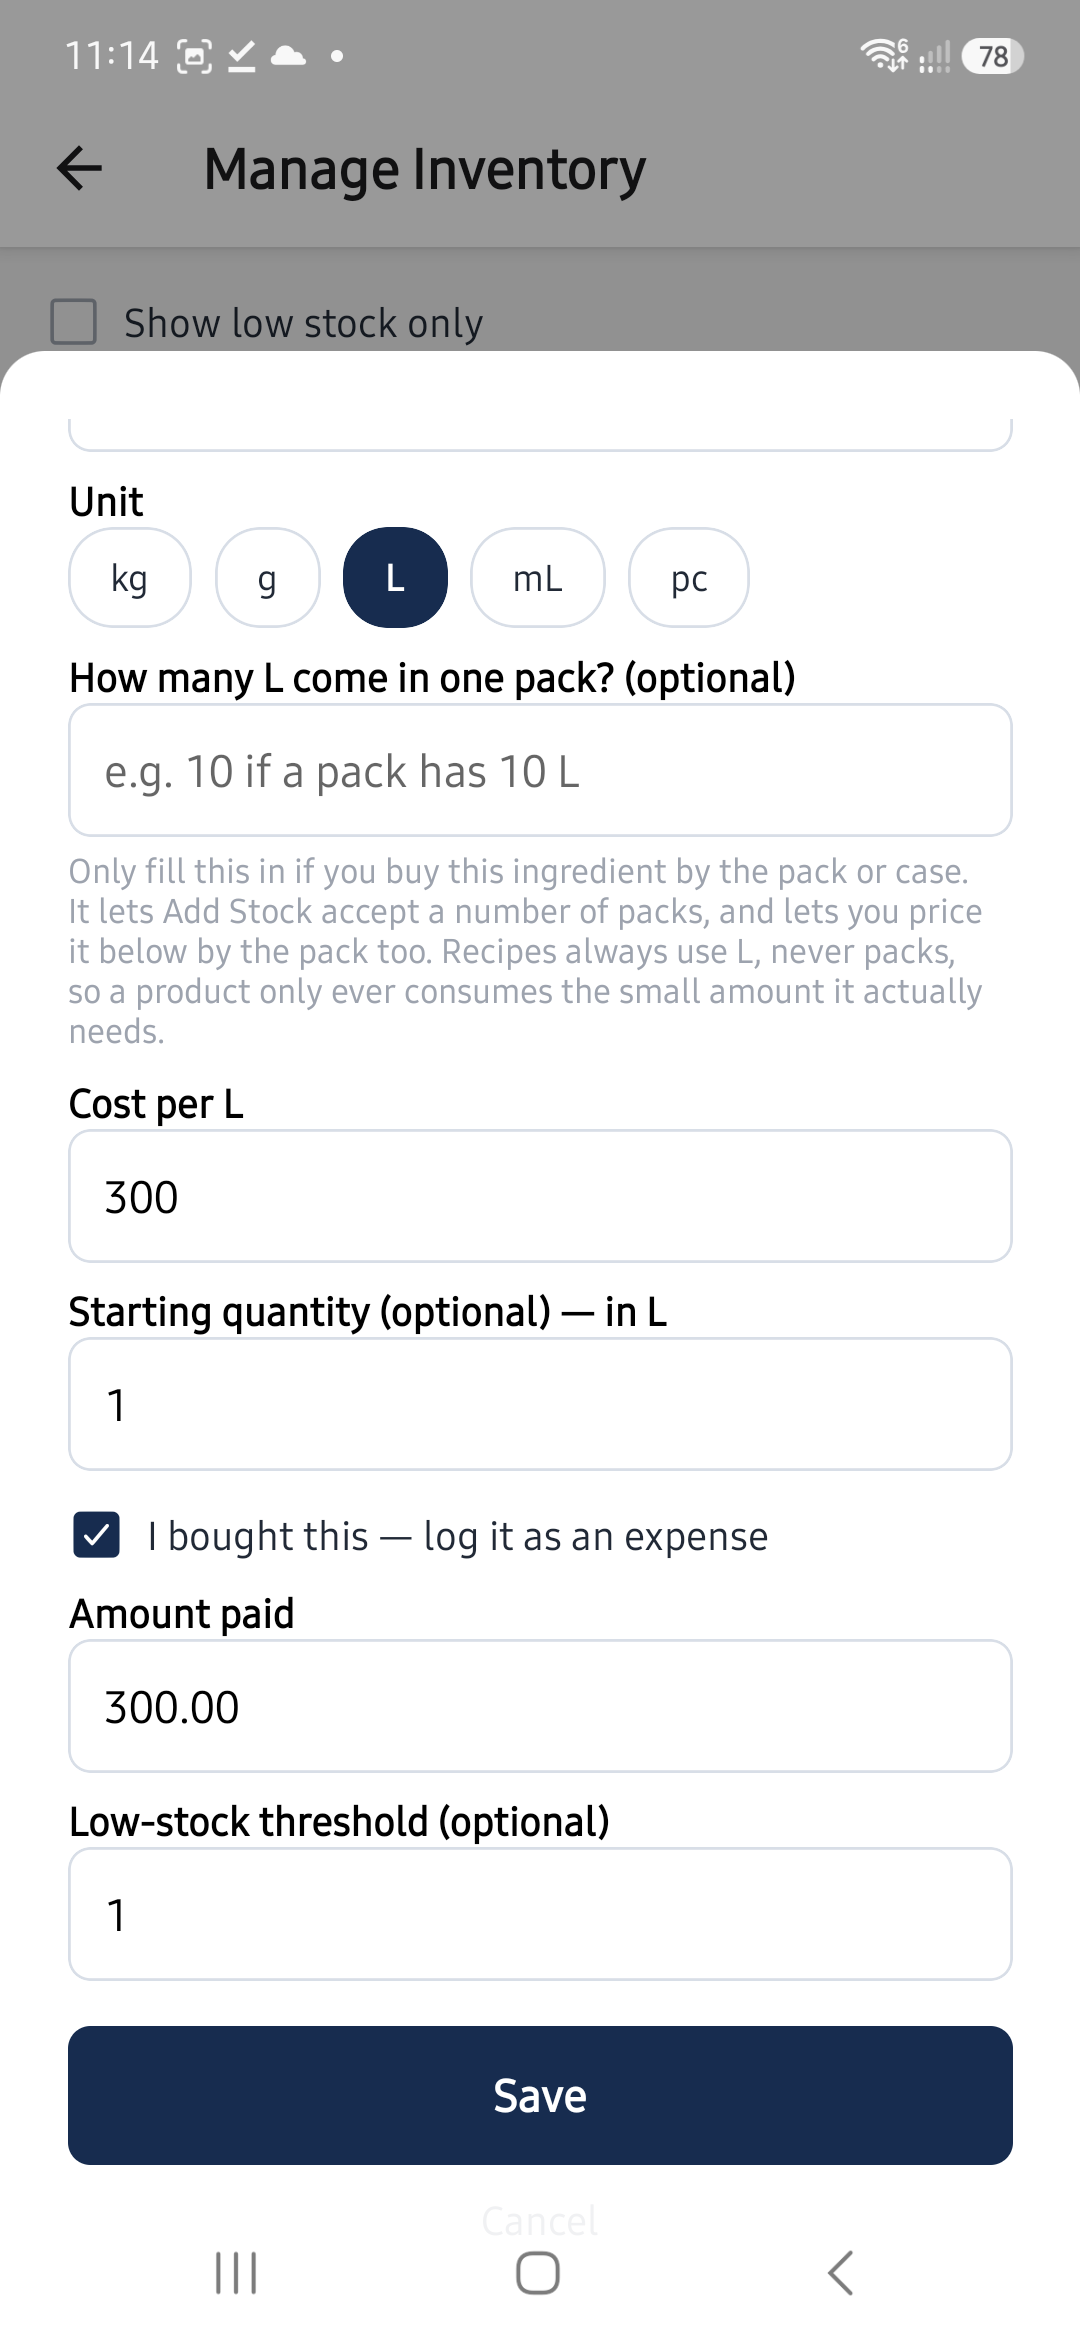
- Record new stock you've bought — this also logs the cost as an expense automatically. If you buy in packs or cases, switch the amount to "Packs" and set how many base units come in one pack.
- Record stock used or adjusted manually.
- See a low-stock alert on the Dashboard whenever an ingredient drops below its threshold.
- Remove an ingredient using the trash icon on its row.
Inventory list with low-stock badges
Editing an ingredient with pack size
Adding a new ingredient — check 'I bought this' to log the cost as an expense at the same time.
Recipes link a product to the ingredients (and quantities) it takes to make it. Once a recipe exists for a product, selling it automatically deducts the right ingredients from inventory, and you can see the product's true cost and margin. Recipes are optional.
7. Waste Log
From Settings → Waste Log, record ingredients or finished products that were wasted — expired, spoiled, overproduced, damaged, or "other" — along with the estimated cost of the loss.
- Wasting an ingredient removes it from inventory and logs its cost.
- Wasting a product logs its recipe cost as a loss (or ₱0 if it has no recipe).
This gives you a running total of what waste is actually costing you, separate from lost sales.
8. Quick Entry (Chat)
Tap Quick Entry (Chat) on the Dashboard to log a sale or purchase by typing a sentence instead of filling out a form.
- Type your message, or tap the microphone icon to dictate it. Use @ to tag the exact ingredient or product:
bought 2 kilos of pork @Pork for 320 pesosorsold 2 burgers @Burger for 300 pesos, cash. - The app parses whether you mean a purchase or a sale, and shows you a plain-language breakdown of what it understood before anything is saved.
- Tap Confirm to save, or Edit to correct and re-send.
A single message can only describe one kind of thing (all purchases, or all sales). If you don't state a price, the app uses the item's last known unit price and tells you it did so.
9. Reports (owner only)
From Settings → Reports, choose a report type and date range (Today, Last 7 Days, or Last 30 Days):
- Daily — sales, expenses, and profit per day, plus average daily profit.
- Product — which products sold the most and made the most profit.
- Expense — where your spending goes, by category and percentage of total.
10. Staff access, PIN lock, and biometric unlock
By default, the app has a single owner and no PIN. To let staff use the app without seeing your financials, go to Settings → Set Up PIN Lock and set two PINs:
- Owner PIN — full access, including Reports, Backup/Restore, Reminders, Employees, and Payroll.
- Employee PIN — can log sales, log expenses, and manage inventory/waste, but cannot see Reports, Payroll, or Backup/Restore.
If your device supports fingerprint or face unlock, you can turn on Biometric Unlock from the PIN Lock settings screen. This is a shortcut for the owner PIN only — employees always use their PIN.
11. Employees & Payroll (owner only)
From Settings → Manage Employees, add your staff (name, daily or monthly pay rate) and track their attendance (present, absent, half-day) on a calendar.
From Settings → Payroll, run payroll for a pay period:
- Daily-rate pay = rate × days present, with half-days counted as half. Monthly-rate pay is prorated across the period.
- Salary advances are automatically deducted from the payout, oldest advance first.
- Each payroll run produces one expense entry for the net amount paid out.
12. Backing up and restoring your data (owner only)
Because everything lives only on your device, backing up matters.
- Settings → Backup My Data generates a file of all your business data and opens your phone's share sheet — save to Google Drive, email it to yourself, or anywhere you choose.
- Settings → Restore from Backup lets you pick a previously exported file and restore it. Restoring replaces all current data with the contents of the backup — an explicit confirmation is required.
There is currently no automatic or cloud backup — backing up is a manual action you choose to do.
13. Evening reminders (owner only)
From Settings → Evening Reminders, turn on a local reminder that fires at a time you choose (e.g. 6 PM, 8 PM) if nothing has been logged yet that day. This only works if the app has been opened at least once earlier that day — it's a nudge, not a guarantee.
14. Closing a business day
Once you've logged at least one sale or expense, Close today appears on the Dashboard. Closing a day locks in that day's totals as final. You can reopen a closed day later if you need to make a correction. If you skip closing a day, the Dashboard reminds you the next time you open the app.
15. Everyday tips
- You don't need to itemize every sale — use Total mode on a busy day and go back to itemizing when things calm down.
- Set up recipes only for your highest-volume products first; margin data on your top sellers matters more than complete coverage on day one.
- Back up right after closing a busy week, not just once and never again.
- If you're logging quickly during service, Quick Entry (Chat) is often faster than switching screens — especially for simple purchases.
Still have questions?
Reach us at maabootcamp@gmail.com and we'll get back to you.